

All of the photos in this blog post are photos of what NOT to do. But I had a fun time staging them!
I’ve occasionally heard, both from clients and friends, about horror stories or lack of confidence with tools; many may be scared to use a certain tool, or know someone who has lost a finger (or more) from a power tool.
Indeed, power tools are inherently dangerous: they are designed to transform a very hard material, so have sharp blades, apply a lot of force, etc. With a few key principles in mind, it’s much easier to understand, and therefore, manage the risks. But let me start by sharing my own accident.
Standard legal disclaimer: Do not read this post and think you can use any tool! Be aware of the risks and do not use a tool without understanding how to use it.
Biscuit Cutter, Meet Finger
Skipping over the countless splinters, and the occasional mild burn from swapping a drill bit too quickly, I’ve been fortunate to have suffered only one real accident, with a biscuit cutter.
This was much earlier in my career, when I was woodworking as a hobby rather than a business, so was a little more cavalier both in my thinking and in my care of the tools. I was cutting a slot with a biscuit cutter using a dull blade, holding the wood against the tool by hand instead of clamp or against a fence. The rotation of the dull blade pushed the only thing keeping that blade from my hand - the material - out of the way, and “nicked” the tip of my index finger. That nick could have been a lot worse, but it was pretty nasty nonetheless: it took a small chunk out of my finger, and I wore a bandage for two weeks and my finger was sore for a month, but fortunately, it healed with no lasting damage.
Had I been thinking of “the forces”, I would have realized the stupidity of what I was doing: dull blade or not, this tool is trying to shoot the material sideways out of the tool. So don’t hold the material with your hand behind the blade. Or, a still-stupid but safer approach would be to hold the material by hand with your hand offset from the blade so that, should the material come out, your hand will still be clear of the blade.
This experience, other fears or suggestions I’ve heard in relation to tool safety, and how I personally make sure I’m staying safe, have made me think a little more formally about risks in relation to how the cutting action or force of the tool is pushing against the material.
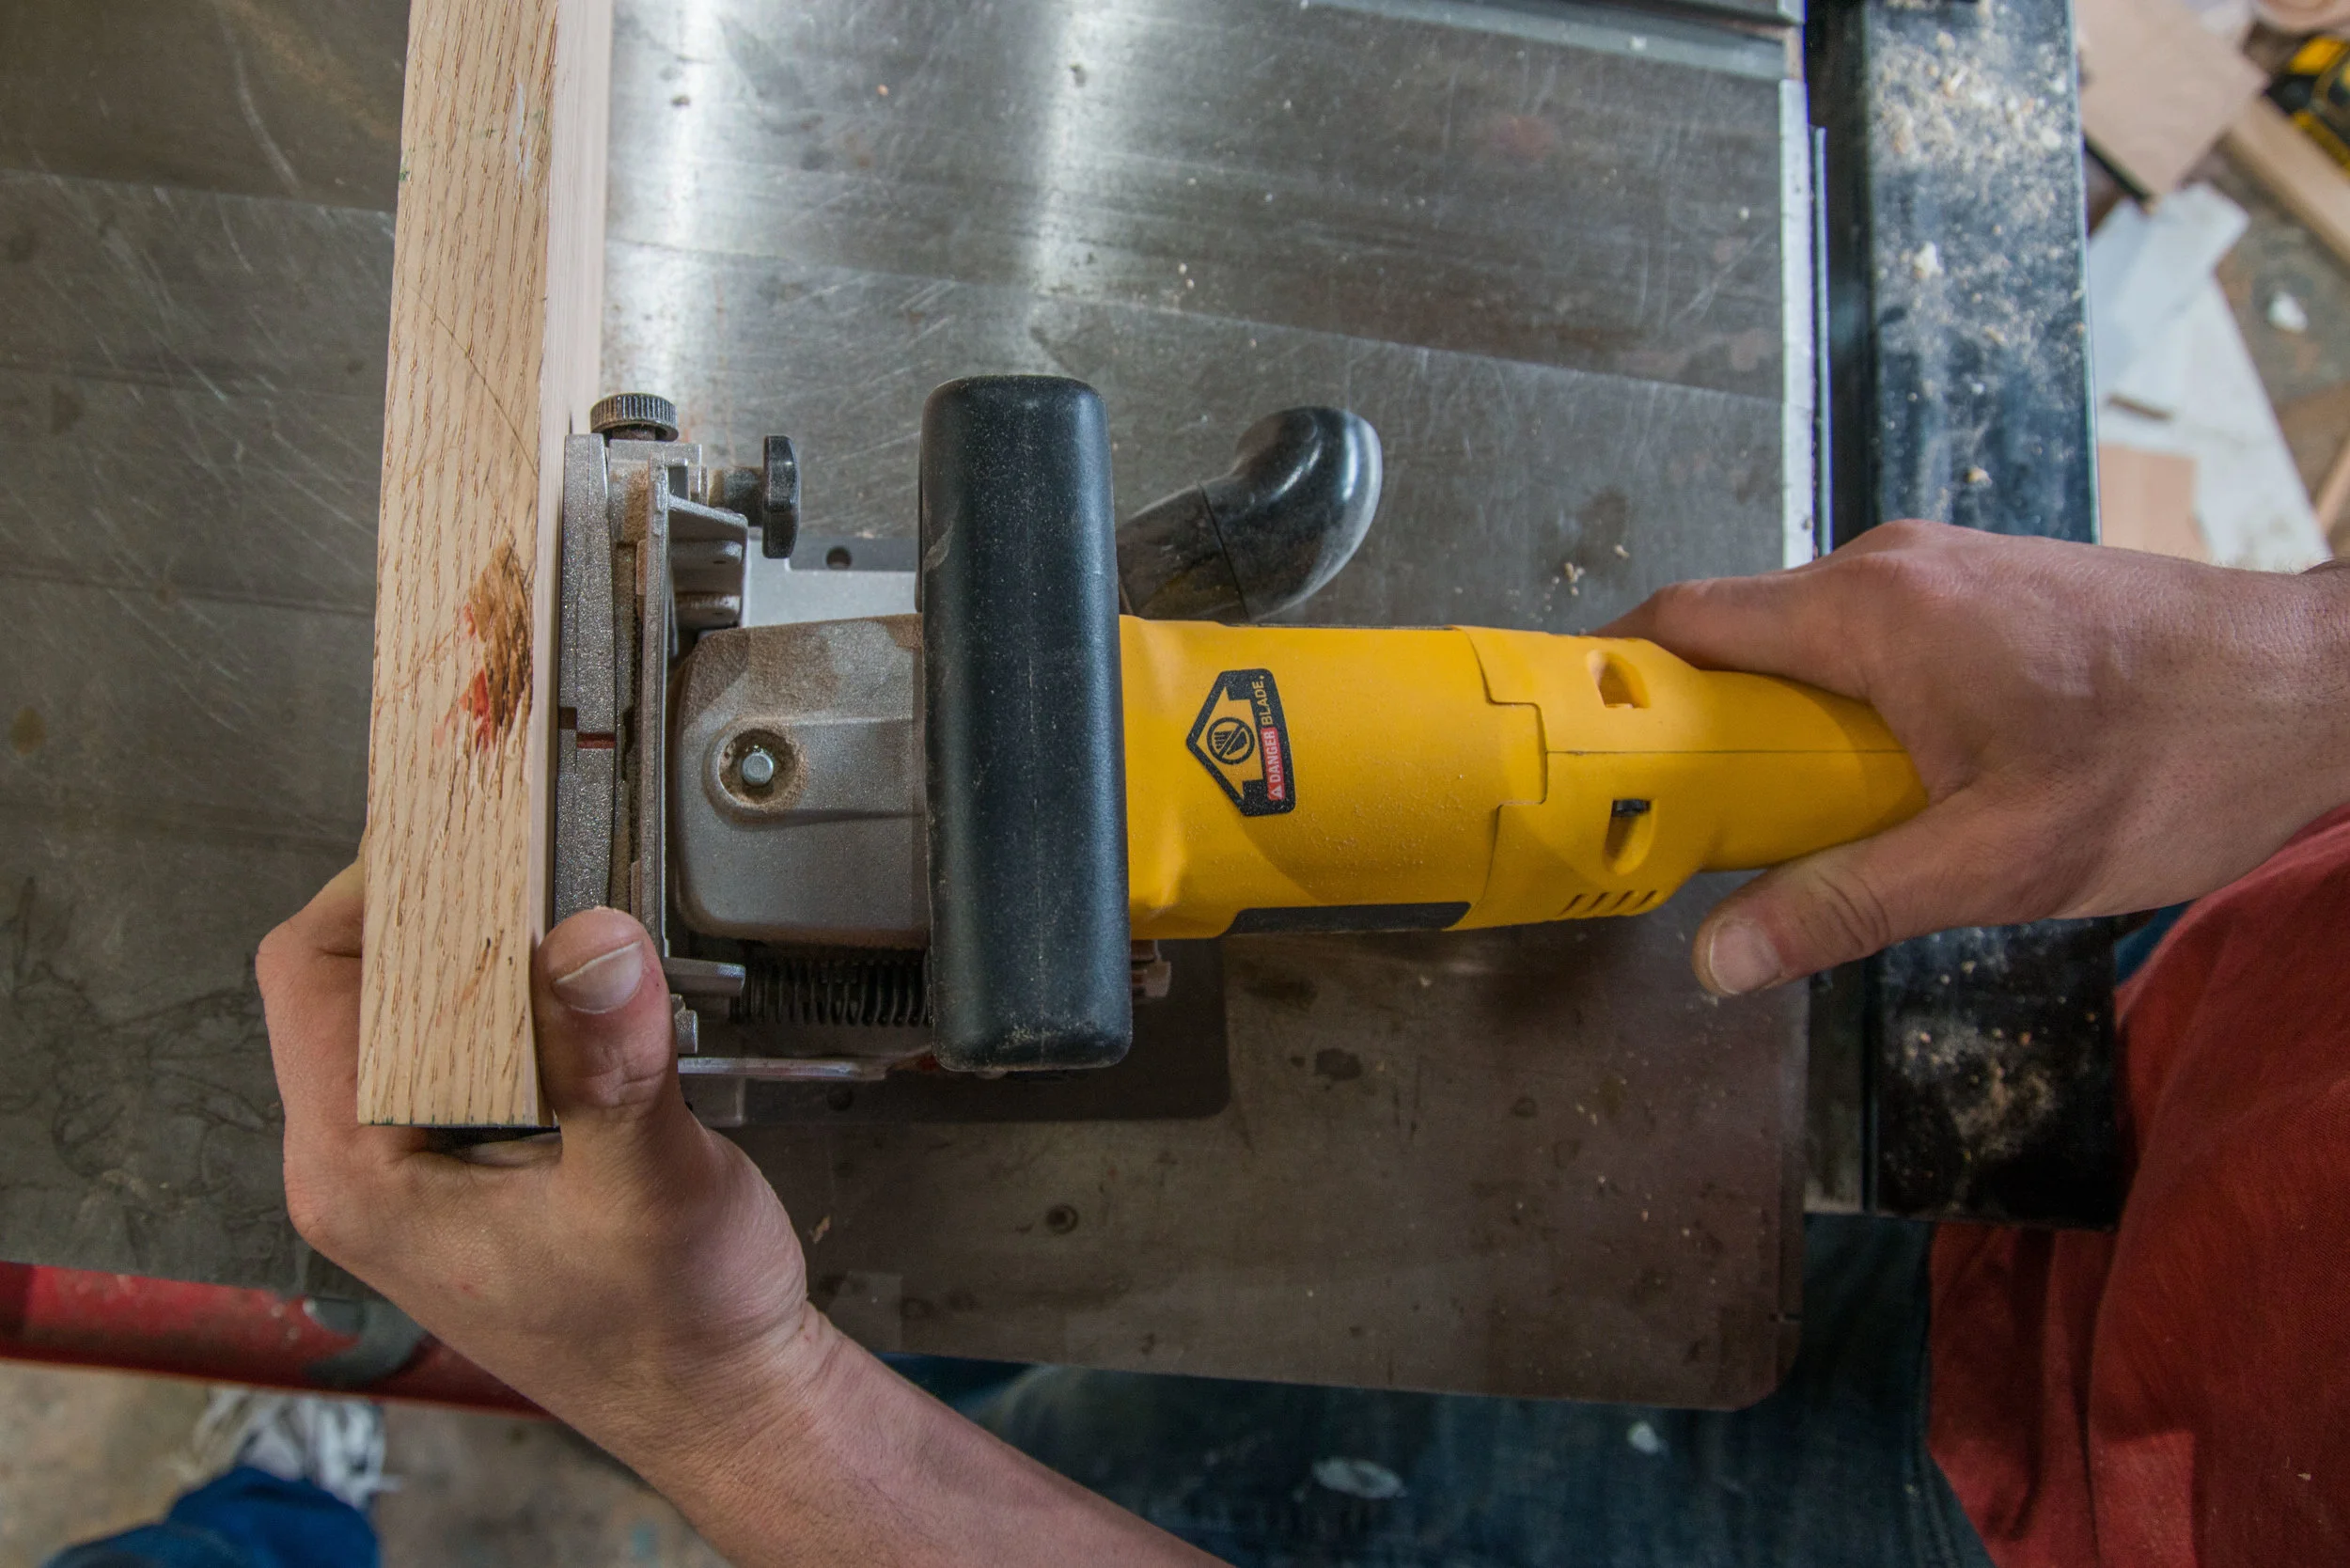
Most Dangerous: This was how I was using the biscuit cutter when I got injured. The blade is spinning in such a way to pull the board to the right (up, in this photo), which would pull my fingers in toward the blade if the board shoots out.
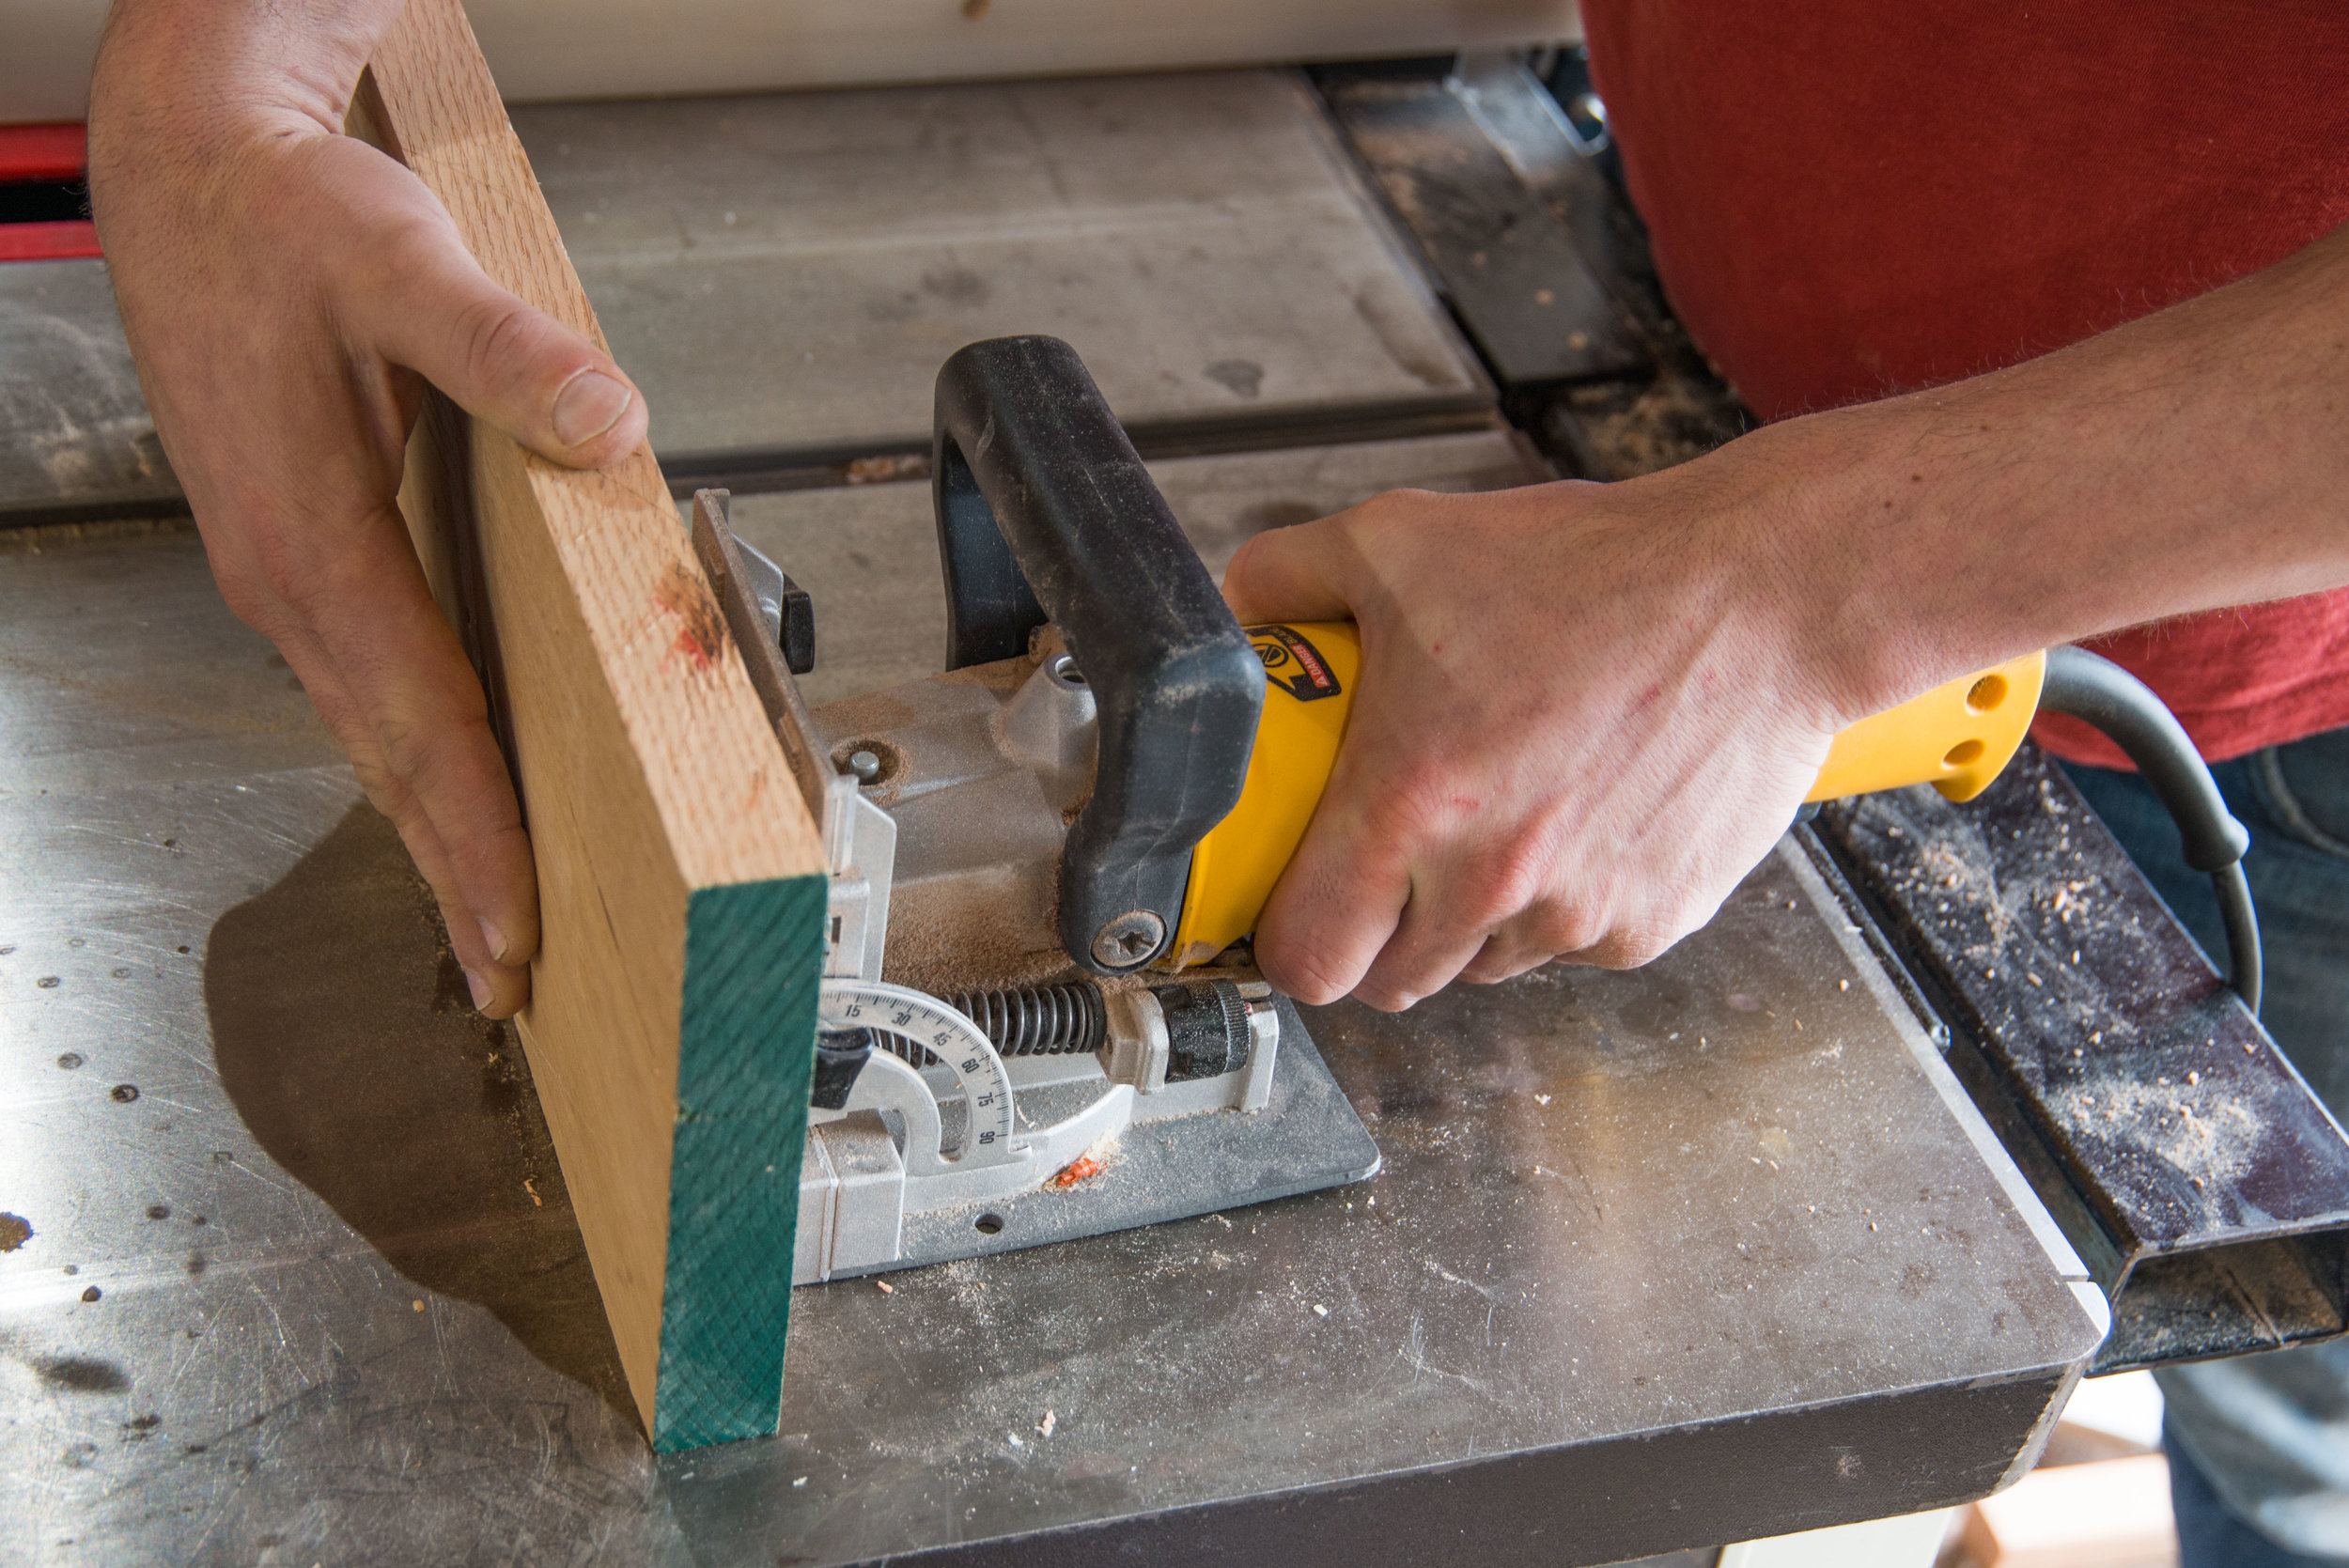
A little better: Though still dangerous, at least if the board shoots off to the right my hand will likely move away from the blade at the same time. But… this is still a pretty bad setup.

Even better, but still not great: No hands are at risk. But the board isn’t clamped to the fence, so it could still shoot out.
Listicle Safety Considerations
First, however, there are some more foundational things to cover. Don’t unplug a tool by pulling on the cord; don’t wear loose clothing or jewelry; check the cord for fraying; don’t use it in the rain; keep the blade sharp, etc.
You can find a hundred online articles with generic (but generally good) guidelines about what to be conscious of in using tools: Here’s one listicle from a company dedicated to providing safety training videos. Great place to start… but also super generic.
Three “general” guidelines I find most relevant for myself are:

There are three bad things in this photo, but the most obvious one is the beer!
Keep a clear floor! Though injuries in a workshop can happen from all sorts of things, many can be summarized into two general categories: 1) you contacting the cutting implement, or 2) the cutting implement sending something towards you at high speed. That first type is much more likely to happen if you’re tripping on things on the floor in your workspace. Keeping a clear floor is something I struggle with a workshop full of equipment and projects, but I definitely clear out the space around major tools as I get to work.
Don’t drink! This seems easy enough, but during onsite projects, I’ve had more than one client offer me a beer or cocktail, a very nice thought and definitely something I’d be happy to accept - at the end of the day. But not in the middle of the project.
Stay focused! I’ll listen to music or podcasts while finishing, sanding, or cleaning - but not while on the table saw. And even when getting into a repetitive task like cutting, say, a hundred coasters, I try my darndest to not let my mind drift.
So… after you read your favorite listicle on tool safety (and the tool instructions), continue on below for slightly more unique content to help keep you safe.
Direction of Force
Think about the direction the tool is “trying” to send the material in relation to yourself. Keeping this in mind should give you much more confidence with some tools and highlight the risks with other tools. Here are some examples, and what that means for guards and risks.
Bandsaw & Vertical Belt Sander
These tools push the material down into the tabletop. This makes these tools fairly safe: they won’t send material flying. But it also means you should never hold an object via hand above the table: the blade or belt will snap it down into the tabletop as you make contact, potentially moving your hand along with the material to some place it shouldn’t be. Need to cut or sand something at an angle? Adjust the table, or build a jig.

Splintered material or hand if the belt grabs onto the material and pulls it flat against the table.

Even more egregious, as there’s no “if” in this picture: the blade will definitely snap the board against the table when the blade makes contact, pinching your hand or perhaps pulling it into the blade depending on how you are standing.
Disk Sander
A disk sander is pulling the material down into the table on the front edge, and up away from the table on the back edge. So only sand using the part of the disk that is going down into the table top, from the center of the disk out to the front edge. If you contact the back end of the disk, it will send the object flying.

That label with the arrow on top is there for a reason: to remind users which side of the disk to make contact with. Hint: it’s not the one I’m touching.
Jointer or Planer
Their blades spin such that the material is being pushed back against the direction of the material is being pushed in by you or the feed rollers. So that means never stand directly behind the material as you are guiding a board through these tools; if the drums slip or an uneven board is pushed in, or a board splits, or you lose control of the material, the entire board could come flying straight back out of the machine.
Similarly, if you are pushing material into them, think about the position of your hand and fingers should a board snap back - you don’t want a broken finger or wrist.

In the (admittedly, fairly unlikely) possibility that this board kicks back, it will snap hard against my two thumbs, perhaps breaking one or both. A better position would be to 1) stand out of the way, 2) pushing with just a single hand, so that 3) using fingers or palm in such a way that any kickback would simple just push my hand out of the way.
That being said, if you are standing in the proper location, a planer is incredibly safe: the blade is fully enclosed so you’d have to purposely push your hand into it. And well-designed guards on modern machines mean that the sides fully enclose the material when planing thin stock, and at least fully cover the active cutting area even with thicker stock. (A jointer, with an exposed blade, doesn’t benefit from these same safety advantages).
Table Saw

My hands are in a correct position here - and I’m wearing goggles. Good! But I’m standing in the wrong spot - that small offcut could be send back into me at high speed. Admittedly, this has become a real risk here because the over-blade guard has been removed.
A table saw blade is also trying to kick the material back towards you; the back edge of the blade is also trying to lift the material away from the table. The exact risks here depends on what and how you are cutting: cross cut or ripping; against a fence or with a miter gage, a large sheet of plywood or a small board. This is why there are splitters (or riving knives), anti-kickback pawls, and guards on table saws - keep these in place if you can! But these guards generally have to be removed to use specialty blades that are commonly in use in woodshops (dado blades, box cutting blades).
In cutting a large sheet or crosscutting a large board by yourself, it can be hard to keep the heavy and unwieldy material square to the blade as you push it through the saw; if it starts to rotate, the side of the blade could grab it.
In ripping a board against a fence, the rotation is less of an issue, but depending on the grain of the wood, the two cut edges of the board that are past the blade might “close up” again past the blade, pinching the blade.
Both of these will send the board or offcut back towards you at very high speeds. Cognizant of this force, then, you should:
Do things to avoid twisting the material. For instance, if you must use a table saw to cut a large sheet, borrow a friend to help keep the sheet straight.
Keep guards in place when you can, or add other guards. The built-in guards help restrain the kickback of the material. Or use a magnetic featherboard - featured in this earlier blog - if you needed to remove some of those guards.
Stand out of the way. If you are using a tablesaw for crosscutting and you can’t keep your hand on both sides of what you’re cutting for whatever reason, don’t stand in front of the “free” end as that side, once cut off, could be sent back into you.
The table saw is probably the most dangerous tool in a shop. Be careful!
Miter Saw
A miter saw (sliding, compound, chop saw, etc.) is trying to pull the material into the fence, away from you (and the back edge of the blade, up).
This makes these saws comparatively safer than a table saw, but that pulling the material towards the fence can cause the material to rotate into the blade if the material isn’t long enough to be supported by both sides of the fence. This rotation can, in turn, pull the hand that is holding the material into the back of the blade if it’s too close to the cut line. So don’t cut very short items without a supporting jig!
I’m cutting a short (~2”) piece a tiny bit shorter and at an angle in this photo - this is bad on multiple dimensions. (1) I have to hold the piece too close to the blade - generally, keep your fingers away from that yellow zone! (2) Because the piece is so short, the end closest to the camera isn’t supported by the fence; the blade, in pulling the piece into the fence, will rotate it into the back of the blade as well. So my too-close hand will be rotated into the blade with the piece. And (2) in cutting the piece at an angle, I’m attempting to just hold the piece at the desired angle, rather than holding it flush against the blade and rotating the miter saw. Great way to lose a finger - but almost certainly, a cut attempted like this will lose the piece!
Drill Press
A drill press is trying to spin the material clockwise. If the material is long, extending past the drill press table top, position it so that that potential spinning would slam the material into the drill press column, rather than yourself!

Should the bit grab the workpiece - as big forstner bits like this tend to do - it will rotate the long end clockwise into me. So I shouldn’t be standing in between that long end at right, and the drill press column in the back of the photo. Ideally, the piece should hit (and be stopped by) the column before me.
And similarly, if you’re cutting something small where you can’t safely apply enough force to keep the material stationary, use clamps or a drill press vice to hold things in place. This is particularly true when drilling into metal - in fact, you may also need to bolt that vice to the drill press table!

Good that I’m using a drill press vice… but bad that it’s not bolted down. In fact, this vice is a recent addition because I neglected to do exactly that.

The bent threaded rod on this vice shows the force with which the vice hit the drill press column. Into the scrap heap!
Finally, if you are holding something by hand because you’re confident given the speeds and material hardness, still, do not put your fingers or hands in a place where it will get crushed or severed if you’re wrong! Holding onto a corner of a lamp base by hand while drilling a hole with a relatively slow (250RPM) and sharp Forstner bit may be safe because if the bit unexpectedly snags the wood, it’ll just push your hand out of the way; maybe you’ll get a cut as the base rotates under your hand. But if your arm is wrapped around the base, or your fingers are in some holes in the table, you’ll have a much bigger injury.
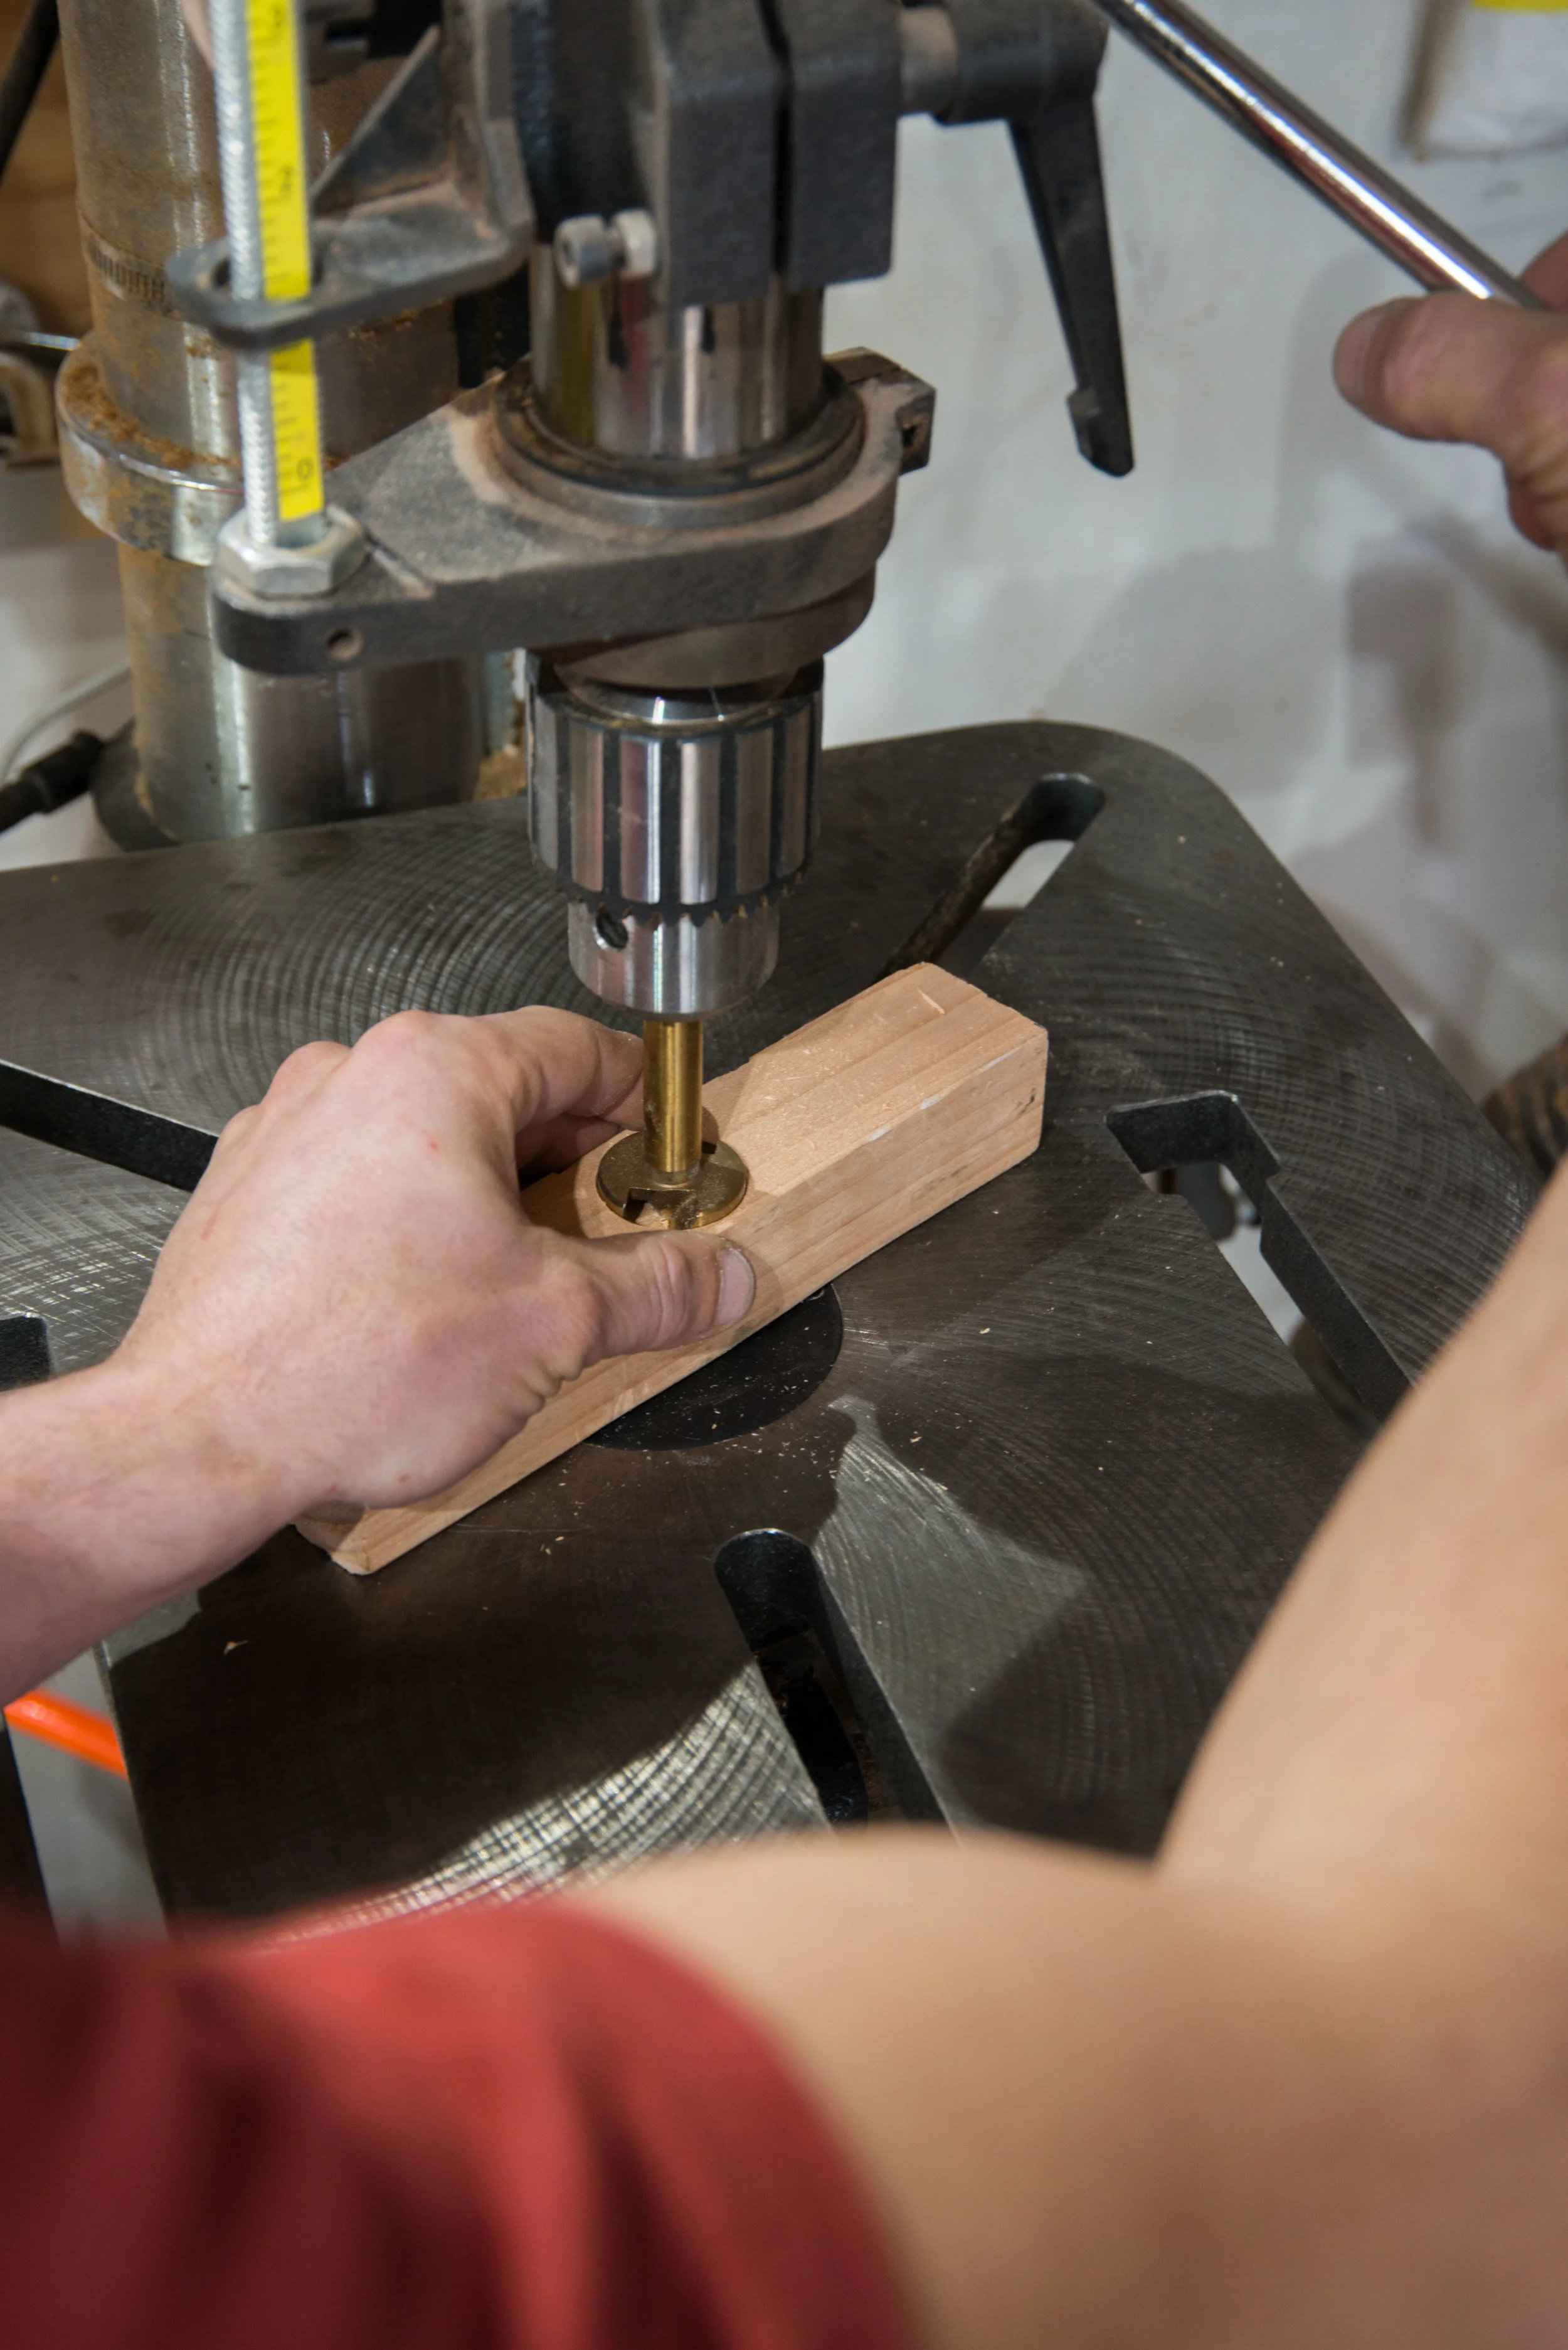
When this piece starts spinning - as its almost certain to do with this large Forstner bit - if I don’t release it quickly enough, it will wrap my hand around the shaft. And avoid any temptation to increase your holding power by anchoring your finger through those holes in the drill press table: that will be even harder to quickly pull out of when the piece turns, shearing your finger off in the process. Ouch!
Table-Mounted Router
A router or shaper is either trying to pull the material away from you or back to you, depending on the side of the bit you connect with. And if you’re using a “spiral” cutter so the bit is like a drill bit (rather than a straight edge cutter), there’s the additional force either pulling the material into the tabletop (which is safe) or pushing it up and away (which introduces additional risks).
There’s too many dimensions to give a quick outline here - this article has some great content. But, given the bit, be sure to think about the direction the material is being pushed or pulled, and what that means for your safety (and for the quality of the cut).
Hand Tools
The examples above are all about floor tools, but you can apply the same thinking to hand power tools as well, thinking not just of the force on the material, but also of the “reaction” force on your hand or arm as you are holding the tool or the material.
Again, don’t let the above be your only safety knowledge! But hopefully it will help you develop some intuition about why there are guards in place and how you can minimize risks when you have to remove those guards or where guards are not possible.
Gloves
DO NOT WEAR GLOVES if there is any risk whatsoever of connecting with a moving part of the machine such as a blade or belt or sand paper! I have heard “why don’t you wear gloves” as a suggestion to avoid the occasional splinter, etc. Of course, I will wear gloves when carrying lumber for exactly that reason. And there are occasions where using gloves with certain tools is either safe or even recommended. But as a general rule, gloves in combination with most wood power tools is dangerous. Do not use them.
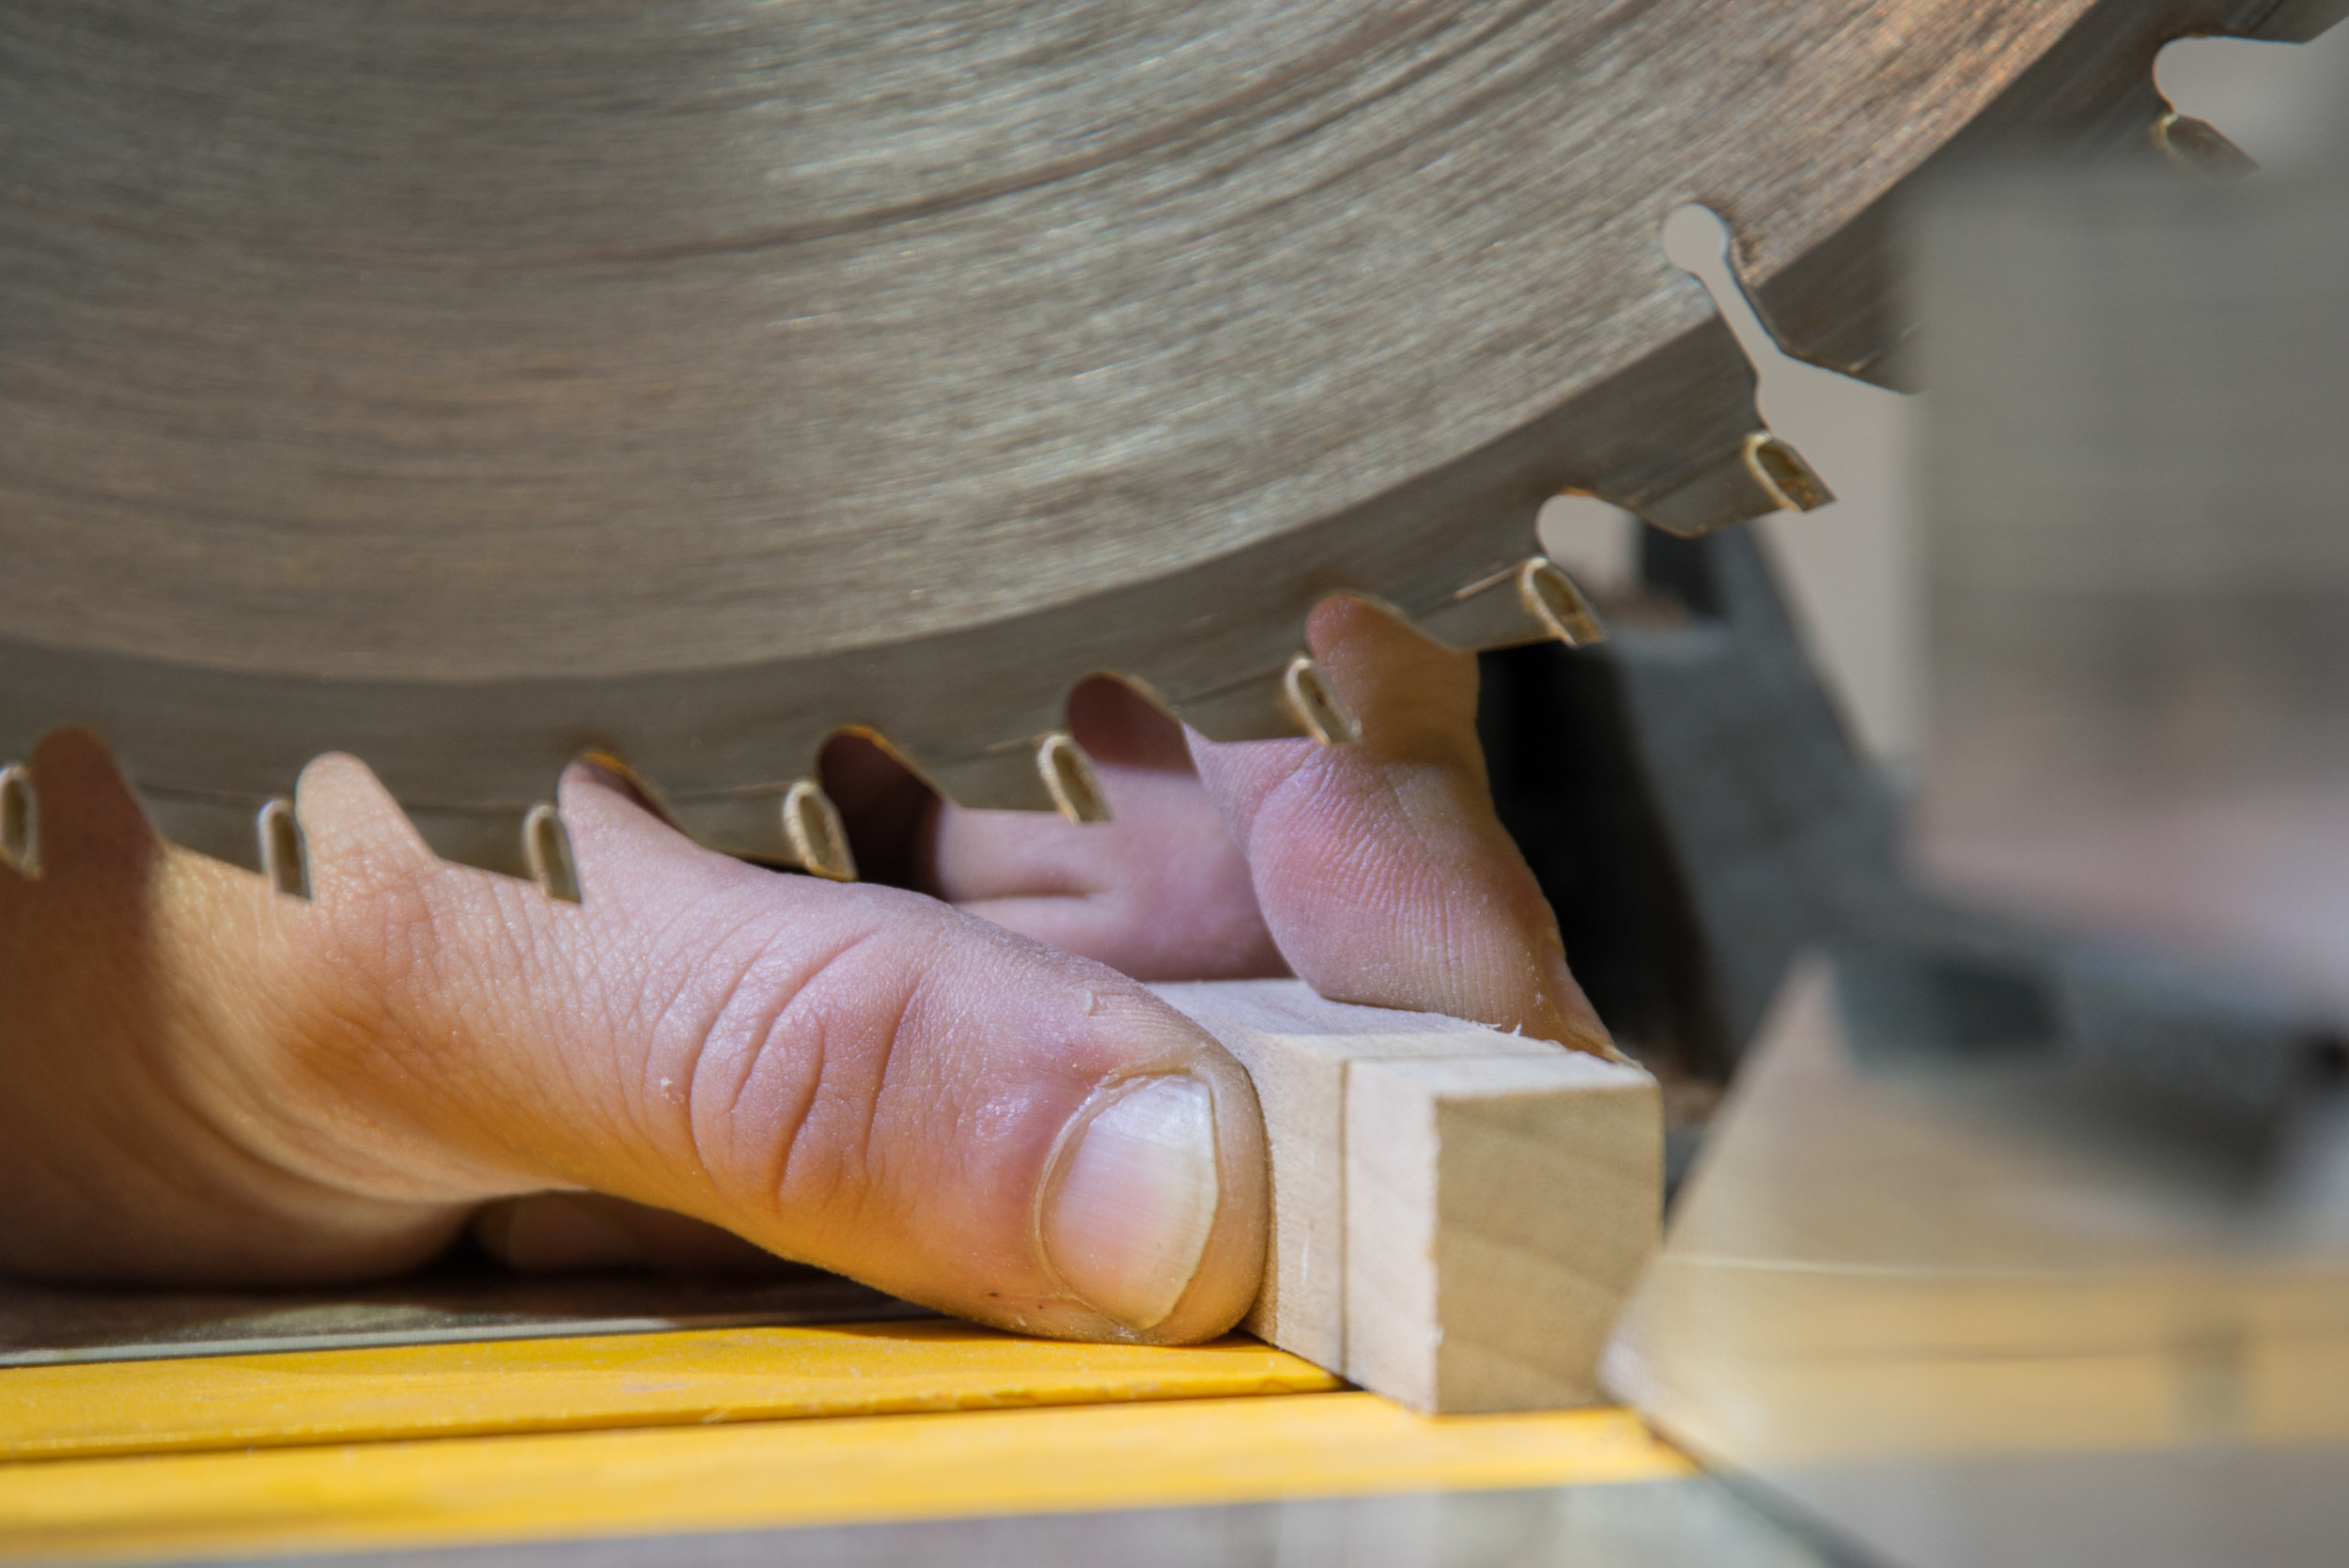
Imagine pushing a board through a bandsaw. If the guards are not in place and/or you lose track of where the blade is, your thumb or other finger could contact the blade. Without a glove, and depending on how quick you react and the type of blade, this would be a nasty cut, or maybe even a lost finger.
But if you were wearing a leather glove, the same protection that helped you avoid splinters would also (1) prevent you from realizing as quickly you contacted the blade, while (2) also giving the teeth of the blade something really tough to grab onto, pulling the glove (and your hand or arm) into the blade. The same is true for bandsaws (a tooth on the blade will grab a leather glove and hold it tight, vs. just cutting your finger), a belt sander (a gloved hand can be pulled into the narrow space in between the belt and a table, given a nasty injury instead of just a mild abrasion or burn), … and so on.
Eyes, Ears & Nose
Finally, the most basic safety recommendations of all: wear goggles. And - depending on what you’re doing and for how long - also wear hearing protection and a mask. An hour of sawdust one afternoon might not kill ya, but a full day, for weeks at a time, isn’t good for you. See the Ventilation heading in this post for a bit more about that!
Acknowledgement
Finally, I’d be remiss if I didn’t acknowledge the expert photography of my good friend, Noel Cilker. He got many artistic shots in this photoshoot, but alas, in culling the list into what would make it into this blog, I picked all the more functional shots instead. So, here’s one for you, Noel!
