About six months ago, a neighbor gifted me with around twenty well-constructed rail-and-stile maple cabinet doors. I had no idea what I’d do with them, but I felt sure the right use would come around sooner or later. After sitting in my garage for a month, then at my off-site storage for a few more, a friend posted them for sale online since storage and working space will soon be at a premium with a major project about to begin.

Alas, though the doors are solid maple, well-finished, and in great shape, there were no bites: a potential buyer would have to both appreciate the style, and need the exact sizes I had; even the hinge cups were pre-drilled in these doors.
But I still could not bring myself to throw them away. Fortunately, an end table had recently caught my eye in the March issue of Woodshop News magazine, which I was able to trace back to Christina Vincent of Maine. Having wrapped up a number of paying jobs, I figured it’s time to build something for friends and family - and myself - again. And bonus: the ipe wedges I have sitting around from my circular staircase project a few months back are perfect for the contrasting legs, so - except for the glass top - the table will be made entirely of “scrap”!
Step#1: Rendering & Design
Starting from the photo, I came up with this detailed design and rendering. The design is key both to generate the cut list, and also because I’ll be using my CNC to cut the circles and the notches in the circles.

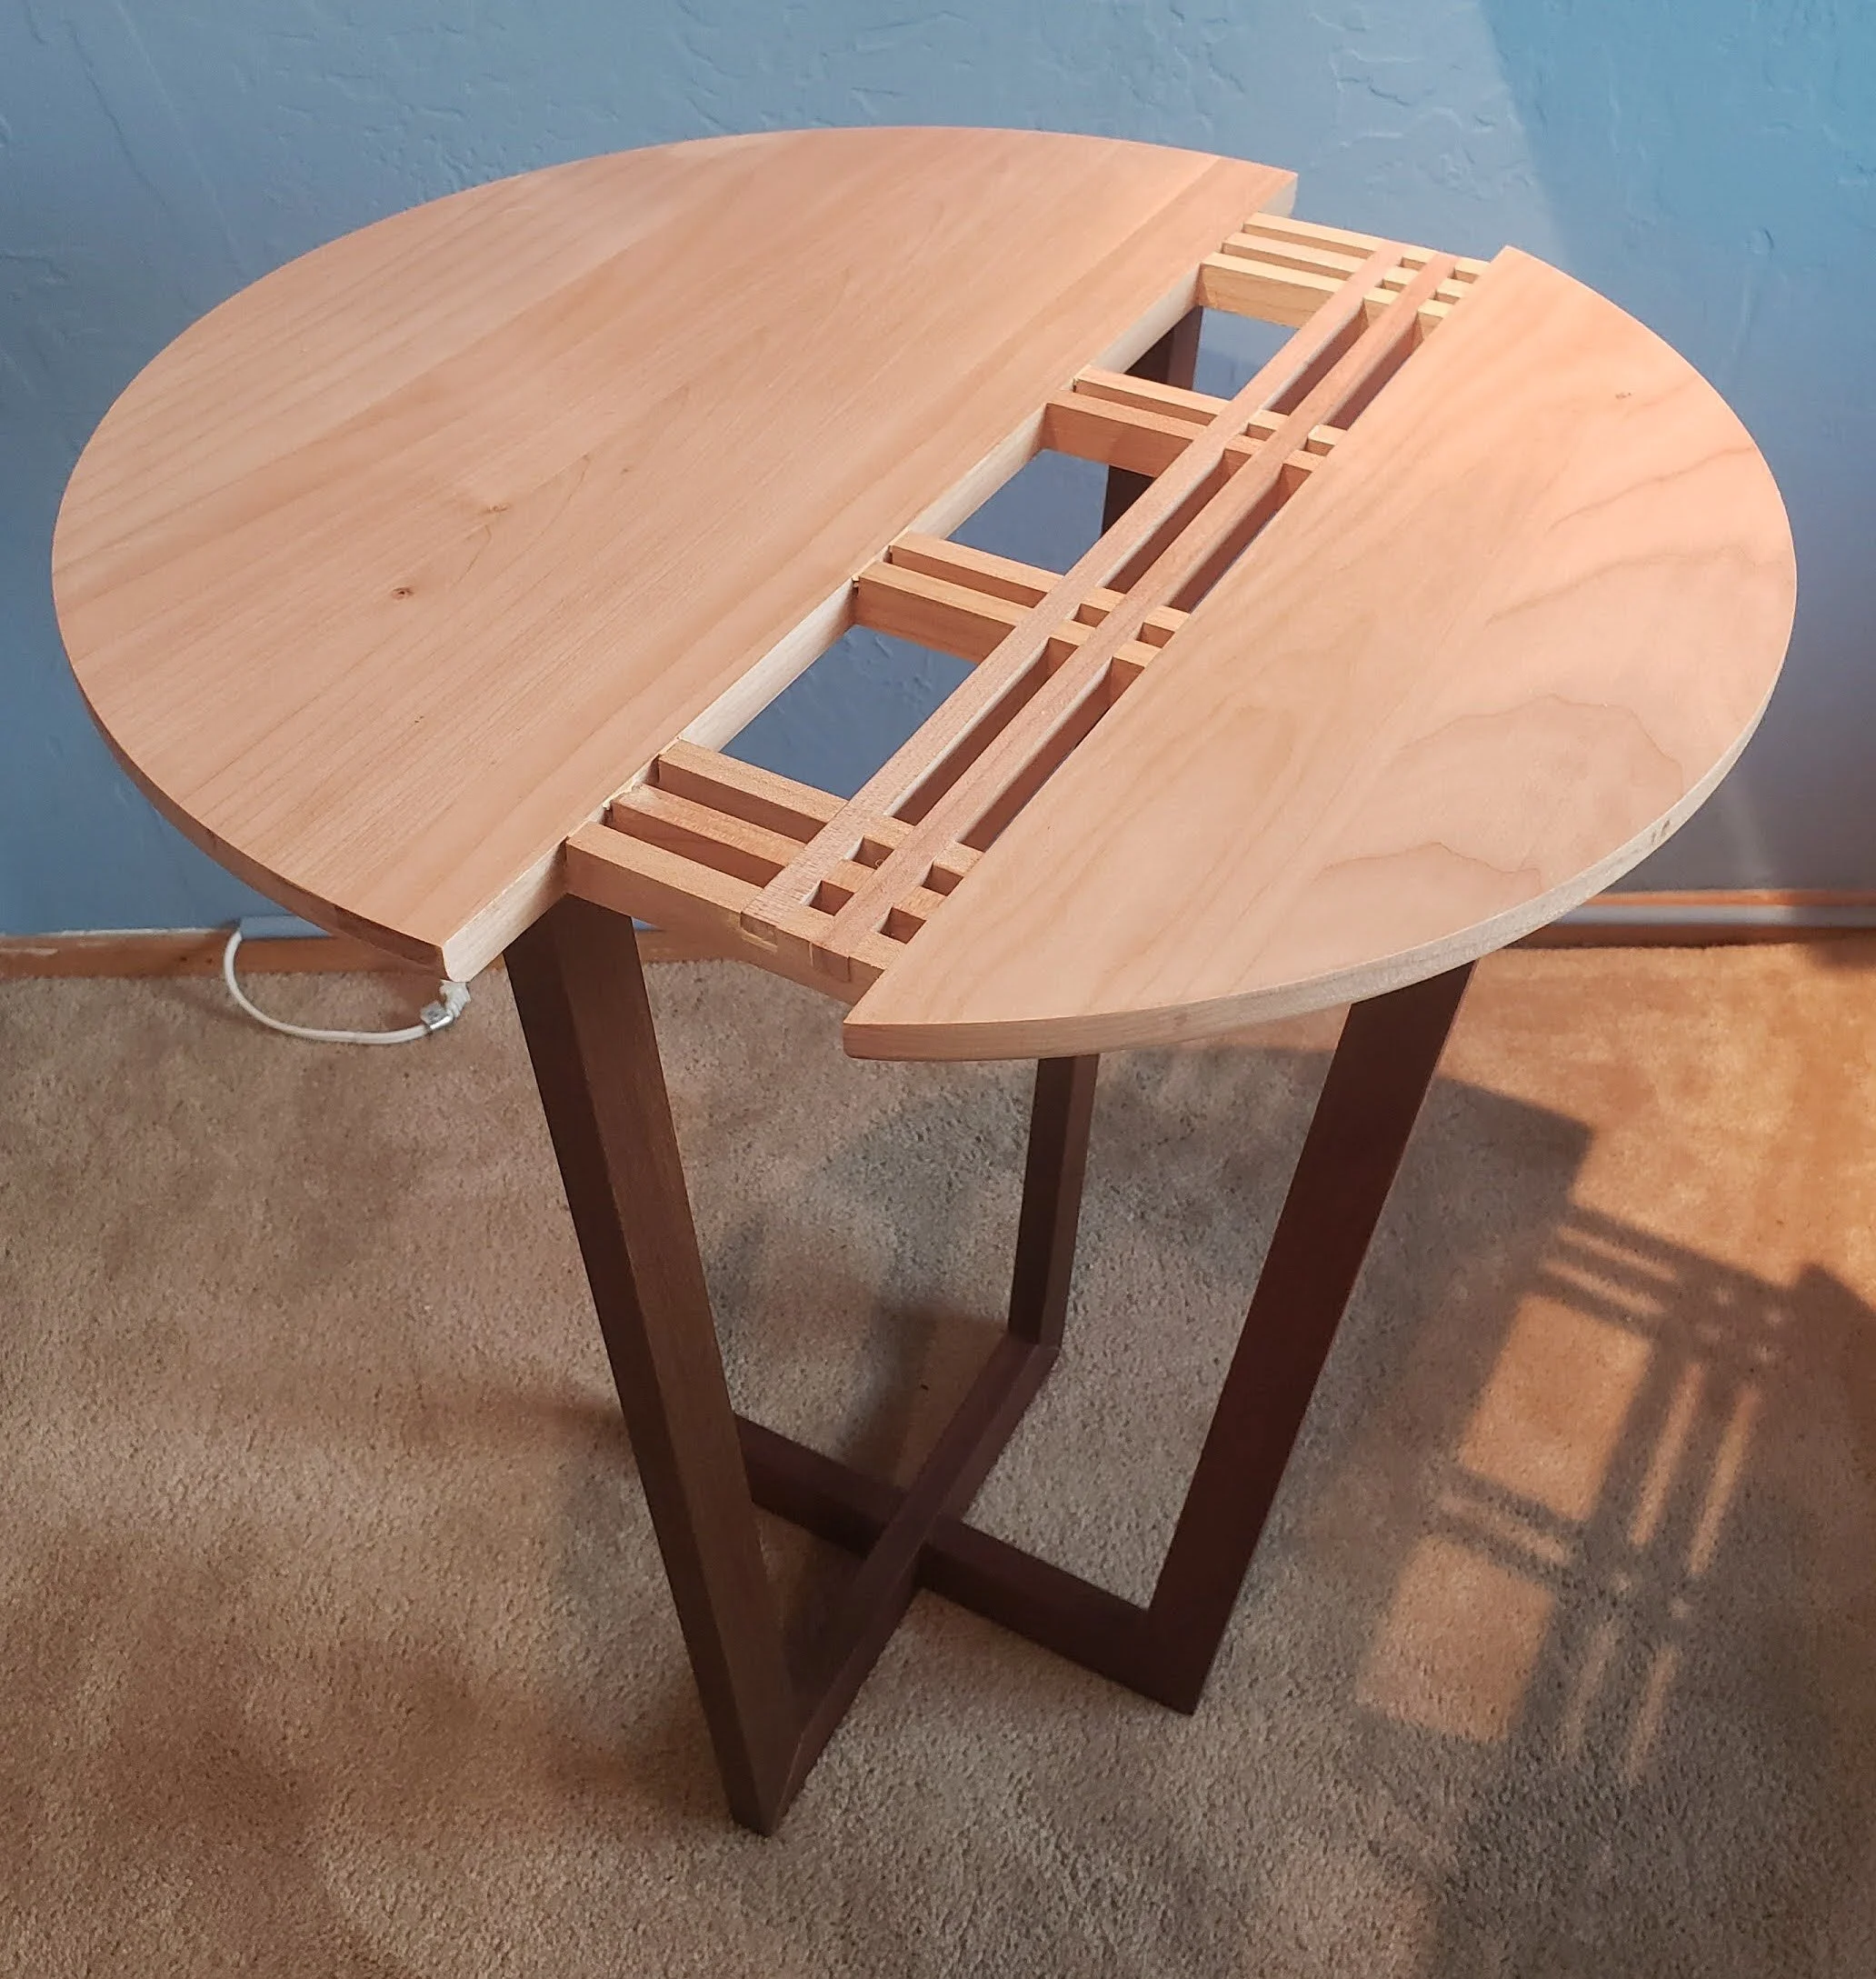
Though I think the open top is a cleaner design that steers your focus towards the joints and the wood grain…

… adding a glass top makes it a little more practical as well as providing some protection for a piece of furniture that I hope is used, not just admired.

Step#2: Transform the Doors to Lumber
As painful as it was to tear into the well-made doors, I ripped the solid maple door panel from the rail & stile border and maple plywood backing. I pulled out a few nails, and then removed the semi-gloss sprayed-on finish by running the doors through the planer. And I then ripped and planed the stiles of the door to make the cross pieces for the center of the table.

Step#3: Cut the Circles
I CNC’d the circles and the notches in the circles; and I used a router with a roundover bit to soften the outer edges of the circle.

Step#4: Cut Ipe Legs
I transformed five wedges per table into the gently tapered legs (four legs and two cross pieces), using my tenoning jig and dado blades to make a mitered bridle joint. This one took a lot of time to get just right due to the slight taper of the legs combined with the not-quite-right-angle of the joint itself.

Fourteen of these wedges became the legs and cross pieces for three end tables. And the scraps left over from the legs are being transformed by my housemate and occasional collaborator into wood rings.

Fit test of a mitered bridle joint for the leg (on left) to the cross piece (on right). Though this is not the first time I’ve made this joint - I used it on this mirror frame a few years ago - getting it just right when neither the leg nor the joint angle is square was a bit more challenging.
Step#5: Fabricate & Assemble the Cross Pieces
Even these cross-pieces are made from scrap: I separated the maple plywood from the solid maple stiles that ran along the side of the doors, and then milled it into 3/8” x 3/8” squares. Unfortunately, the (horizontal) rails of the doors were too short to safely run through my table saw or planer, so alas, some parts of the doors did have to go to the dump.

The door rails (or right) separated from the plywood backing (on left).

From each rail, I was able to get a 20” strip for the cross pieces.
Step#6: Sand & Sand & Sand
A couple hours with a random orbital sander and increasingly finer sandpaper turned a nice surface into a great surface!

Step#7: Assemble Legs & Cut Holes for Domino Joint
The leg assembly is quite fragile and delicate until they are permanently affixed to the table top. So in order to get the legs just right and to ensure that they do not shift from a casual bump in the couple hours it takes for the glue to set, I made a simple jig. Once the four legs are solid, I then marked their location on the table top and used a domino cutter to cut perpendicularly for a 4x20mm tenon.

There’s a brad nail in the plywood template at the outer edge of each of the four legs so that as long as the base is coplanar to the plywood, the legs will be at identical angles.

Finally, I can attach the legs to the table top, making what was a squirrelly and fragile piece super rigid and strong.
Step#8: Finish
Ipe is an incredibly dense wood that does not take any finishes well, but since I have experience (and materials) from that earlier staircase project, I do know that Penofin Marine Oil works well - and for an interior piece of furniture - will last just about forever. I use my usual semi-gloss polyurethane on the maple, and get a custom-fabricated tempered glass panel for the top. And we’re done!
I’m super excited how these came out, both because some of the joints were quite challenging, and because it’s a beautiful table made wholly of scrap that was otherwise destined to the dump or a bonfire.
And for one more example of how I transformed a glass door that came in the set to a plant stand, check out my instagram feed: @BranchingOutWood.