
My workshop is too small for a proper workbench — and the one I’ve had for years barely counts as one. Its surface wasn’t flat, wasn’t sturdy, and wasn’t much of a workspace at all. A few folding tables filled in when needed, but they too were uneven and temporary. So I decided it was time to build my own: a compact, mobile workbench designed to do more than just hold things.
Given the limited space, every piece of equipment has to earn its keep — ideally serving more than one purpose. I wanted this bench to roll easily yet lock firmly in place, adjust in height, and provide a perfectly flat surface large enough to be genuinely useful but small enough to tuck away. Even better if it could also double as a downdraft sanding table or a roller stand for the planer or table saw.
That wish list led me to a torsion box design with two distinct sides: one covered in low-profile roller balls, the other perforated for dust collection. The internal ribs are hollowed out to allow air to pass through, and the whole assembly rests on a compact scissor-lift stand. In keeping with my own rule of buying used when possible, I looked at several heavy-duty scissor lifts — solid, affordable, and massive — but ultimately too bulky for my space. Eventually, I found a smaller, inexpensive lift mechanism with a 20-inch height range (8"–28"), lockable wheels, and a 330-pound capacity — a perfect foundation for my multi-purpose workbench.
What is this Torsion Box thing?

An earlier torsion box I fabricated that was far heavier than I’d want this one to be.
A torsion box is a strong, lightweight, and rigid structural element made by sandwiching a grid of internal ribs between two thin outer layers, called "skins". This construction principle creates a flat, stable surface that resists bending and twisting, and it is used in applications ranging from aircraft wings and doors to furniture and - here - workbenches.
I made one years ago that acted as the working surface of my original X-Carve CNC, which you can see in use here or in fabrication here. Though that worked at the time, the ribs were far thicker (and heavier) than they needed to be - the ribs for most interior doors are just a hair heavier than corrugated cardboard, for instance.
This time around, I made the ribs much thinner (3/8” plywood) and much taller (4 1/2”) to make for a lighter-weight but stronger box. And I notched out interior channels in those ribs so that by connecting my dust collector, I can get airflow to all the holes in the downdraft side.

Ribs were dadoed into the sides, and made with half-lap joints to the ribs that go in the opposite direction, both for strength, but also for each of assembly with so many pieces that need perfect alignment so as to not block the air holes (or interfere with the roller ball bodies on the to-be-attached other side).

The downdraft region was separated from regions where there were no downdraft holes both by virtue of the absence of holes in the ribs, and by additional caulking applied on the interior joints. All the holes in the ribbing had the additional benefit of making the table lighter without sacrificing strength.

The roller balls were purchased online; I used the CNC to cut the holes and recess the border just slightly to allow for a snug fit and a little Liquid Nails; once that dried, on the other side, I applied a liberal coat of silicone caulk here to minimize any air leaks.

I used lots of clamps with the final assembly to ensure there was no bowing in the outer skin, to keep it as flat as possible. You can also see the two large rectangular notches on this side (which are also cut on the opposite side) to ensure the surface is solid on the lift table.
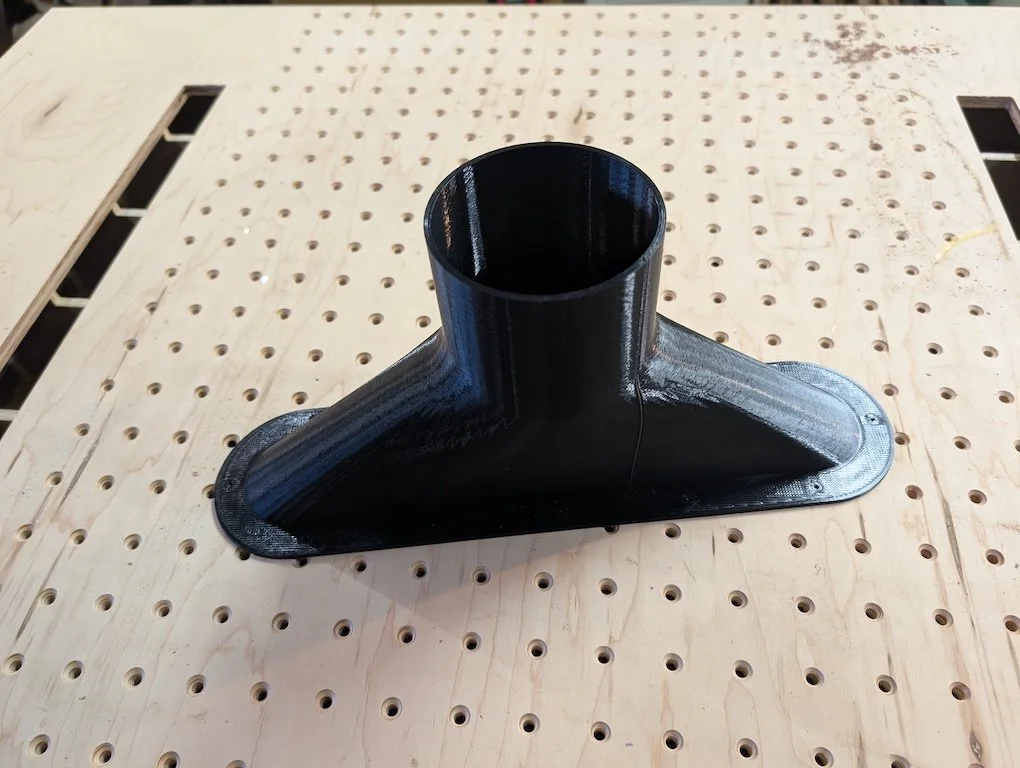
Custom-fabricated dust boot. Both ends have about 12.5” square inches of area, with no sharp edges, fits to a 4” hose. 3D printed by Brad of Fournier Woodcraft for a very reasonable price from a .stl file I provided.

With the dust boot in my shop, I can now confidently cut the air opening for it; before screwing it in, I also gasket it with a thin layer of neoprene.

The table has been invaluable both as a downdraft table for sanding…

and as an outfeed support for the tablesaw…

… though one late change I made was to add density to two rows of roller balls so that ripping narrow stock is better supported.
In addition to using it for these two purposes, I’ve already put the lift to work at a client site — it made positioning a hanging cabinet effortless before I secured it to the wall — and of course, I’ve used it as a workbench for several projects. It’s proven to be incredibly useful all around, and it hits every goal I set out for in such a small footprint.
I’d love to hear from you: what multi-purpose shop tools or equipment — custom or off-the-shelf — help you do more in your never-big-enough space?